The P18 and P19 kit has been bought a couple of years ago, something like 12....er, 15.
Decals of the Sundowners are all yellowish and had to have the Johnson Klear sprayed over in 4 coats and put in the sun for 2 weeks to get the white back and the film transparent again.
Then down to work. The cockpit is decorated with Eduard F14A Colour Etched set. However, the side walls added created a problem for me as the ejection seats will not fit into it.
So, I left that to the remaining part of the build to worry about it later. However, I did find the fit not very well engineered particularly the wheel wells, the fit of the front fuselage to the remaining parts of the fuselage and a lot of sanding needed to be done. Some parts in the region of up to 0.6mm, this is unheard of these days. But then, the kit is 20 years old.

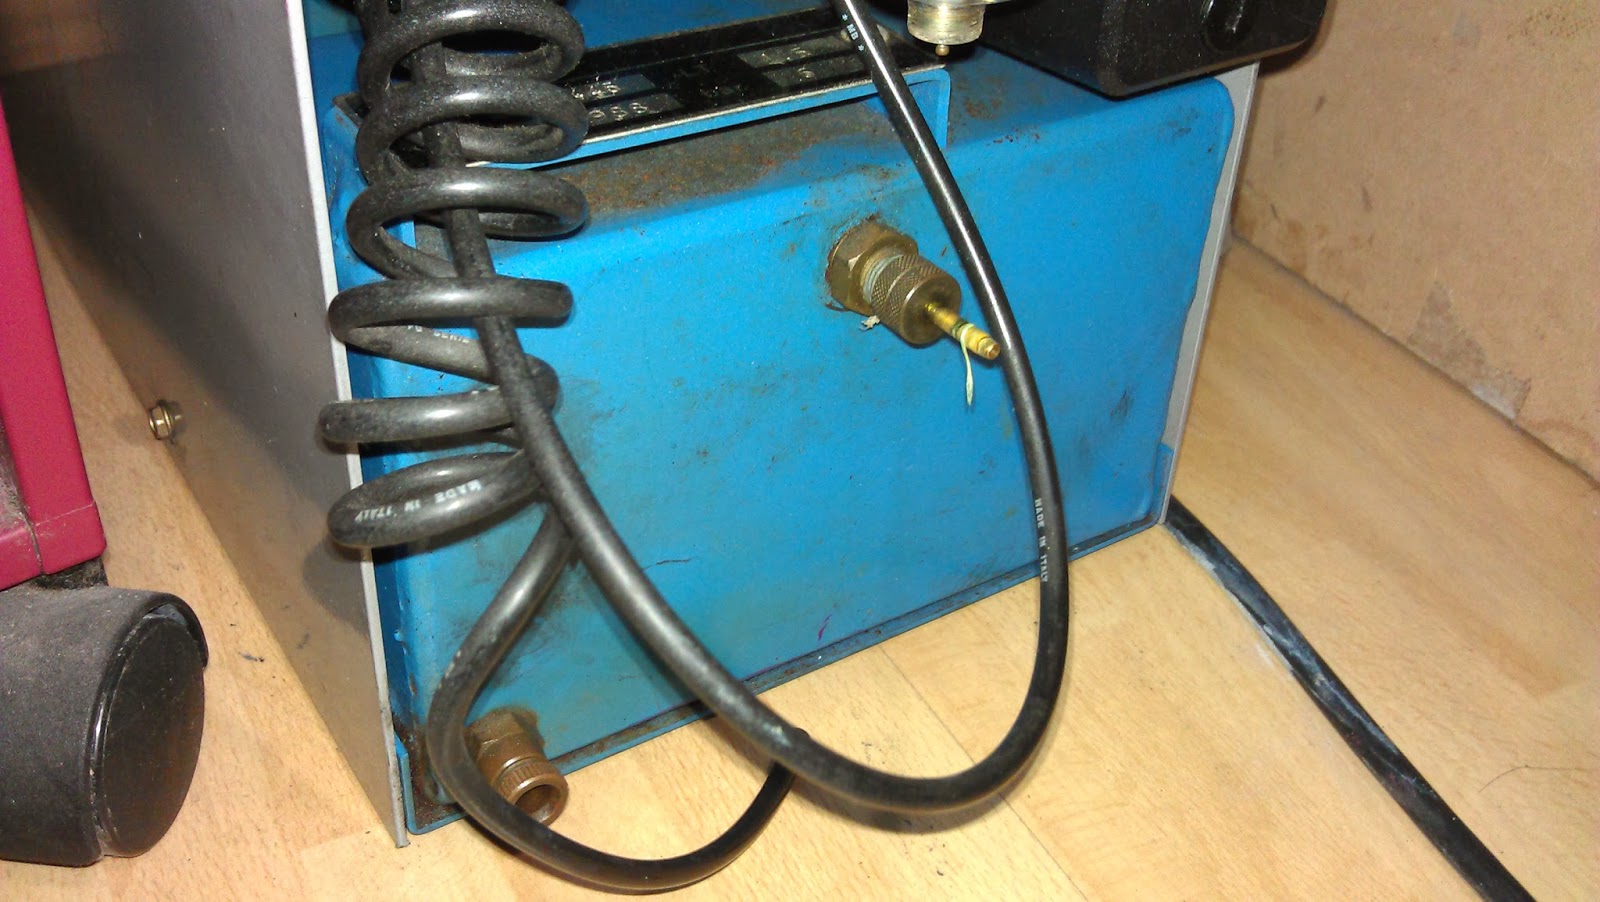
Then my trusty 1984 Silair compressor had a major leak after sending it to the agent for an air change. The problem is China and Phillipino workers here with fake certificates bought from real universities! The thing was working find, and now, the Silair agent gave it noice, screeches, burst pipe and leaking connections that I needed to spend 4 hours to fix all the problems except the misaligned diaphragm, now it pumps every 10 sec breaks because the diaphragm is leaky. So, if you are in Singapore, pour out the oil yourself and top it up with good old Mobil One. Never send it to Hup Hong for servicing, because they will break it to sell you a new one.
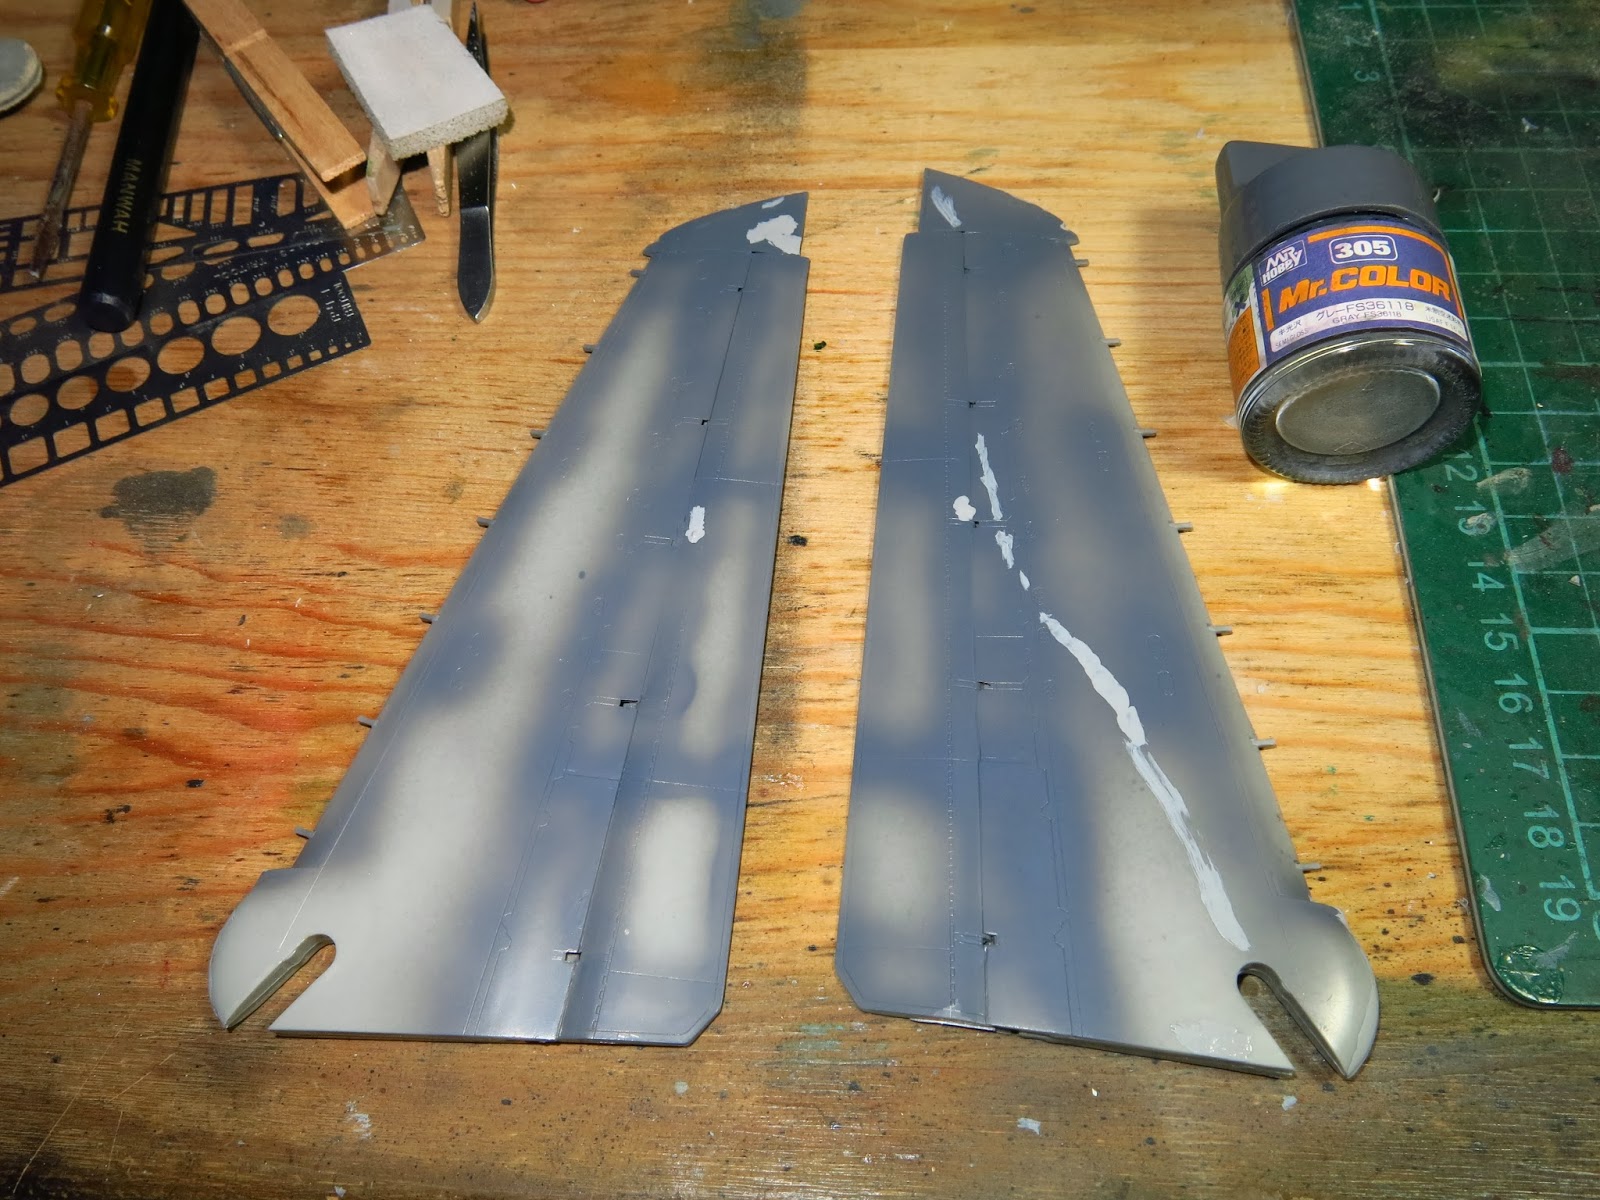
The wings are preshaded and then self mixed Mr. Colour greys are added in cloud patterns. Packing lines are filled up with Mr. Colour White Primers and sanded down with 800 grit Tamiya 3M sanding sponges.
The wings are given 3 coats of Klear and then decals are added. Problem I have is the decals are too thin and disintegrated upon removal from paper. Alot of it were jig saw puzzles. So, I ended up hand painting the flight formation lights and large patches. I also used Vallejo paints to do the leading edges. I looked for Fightertown and other Aeromasters decals and ordered something like $100 of decals so that I can be sure it will work. I also added Tamiya brown wash and AK Track wash and set aside to dry for a day and then buff it up with moistened cotton cloth with Tamiya enamel thinners.
After the streaking, I oversprayed the area randomly with lightened gull grey self mixed, to tone down the contrasts and added more weathering being the moving surfaces to simulate dusts and hydraulic staining.
I added the patches of lightened gull grey to simulate the patches of new paints oversprayed on board to protect scratched or exposed metal from corrosion in the sea environment.
See the truth being told, See the amount of paint patches on this guy? I am doing like 5% of this because I know that people are not ready to accept this as a good model, they will say I sort of screwed it up. People have a lot alot to say now a days, but no models to prove that they can do it better. I also made a purposeful cut of the area of the walkway and lets see what other critics out there can say.
Doing up the 2nd wing to balance the tones of the the weathering.
Wings experiments done, now back to solve the cockpit area. This is what is left after a week of frustrations at 1 to 4 hours per night!
After doing the spray painting and toning and 4 washes, I sponged chipped the rubber walkway area like you will see on the real aircraft and chipped the port side to give it a non aligned look. The decaling prior to this is most frustrating as almost every major piece needed Vallejo painting and Tamiya diluted yellow patches to "heal" broken parts.
The wings are positioned to check for tonal uniformity, looks like more is needed for the body work to match, I also used McDonalds Ketchup disks as masks to make the oil streaks on the pivot areas of the wings and dry brushed the inflatable bladders taking care to retain the contrasts to keep the 3D effect.
The fuselage is now coated with 3 layers of Klear to get it ready for stencils. I did not like the smashed up decals, so, I masked the blast area warning lines and painted them in Vallejo through low pressures.
Almost can jalan liao. Colour matching almost there. Now back to the cockpit headaches. I noticed that Hasegawa made this model without both HUDs! OMG! After all this work, there is not a photo etch part in the Eduard set to solve this! Leave it alone before I lose my sleep, I am heading out to Australia for work and then I will endure it further, after all, you are looking at 6 months worth of enduring already! Till next time, endure!