Monday, December 9, 2013

Melbourne break and F14A Hasegawa Part 2

Took a few days in Melbourne for work.

Guys at Armour and Mechanical Testing

25 Pounder, the field kind, not our national day spit and polished one.

I took sometime to visit Victoria Hobby Centre in Flinders Street in Melbourne CBD area. The murals on the 2nd floor shop is nicely done and 10m in size!

Tiger Tank and Spit Fire on top

F1 car and body of Locomotive in background

Fuselage of Spit Fire too large for camera 24mm wide angle.

32 scale showcase

Walkway rubber pads being padded in by sponge

Patches of brand new Gull Grey being patched in for anti corrosion you see on real aircraft.

Closer look the patch work. Toned down to prevent looking too extreme as the judges may not like it too real, they prefer it to be eye candy.....so I have to exercise extreme restraint.

View of the real thing.


Sunday, December 1, 2013

1/48 Hasegawa F14A Jolly Rogers

The P18 and P19 kit has been bought a couple of years ago, something like 12....er, 15.

Decals of the Sundowners are all yellowish and had to have the Johnson Klear sprayed over in 4 coats and put in the sun for 2 weeks to get the white back and the film transparent again.

Then down to work. The cockpit is decorated with Eduard F14A Colour Etched set. However, the side walls added created a problem for me as the ejection seats will not fit into it.

So, I left that to the remaining part of the build to worry about it later. However, I did find the fit not very well engineered particularly the wheel wells, the fit of the front fuselage to the remaining parts of the fuselage and a lot of sanding needed to be done. Some parts in the region of up to 0.6mm, this is unheard of these days. But then, the kit is 20 years old.


Then my trusty 1984 Silair compressor had a major leak after sending it to the agent for an air change. The problem is China and Phillipino workers here with fake certificates bought from real universities! The thing was working find, and now, the Silair agent gave it noice, screeches, burst pipe and leaking connections that I needed to spend 4 hours to fix all the problems except the misaligned diaphragm, now it pumps every 10 sec breaks because the diaphragm is leaky. So, if you are in Singapore, pour out the oil yourself and top it up with good old Mobil One. Never send it to Hup Hong for servicing, because they will break it to sell you a new one.


The wings are preshaded and then self mixed Mr. Colour greys are added in cloud patterns. Packing lines are filled up with Mr. Colour White Primers and sanded down with 800 grit Tamiya 3M sanding sponges.


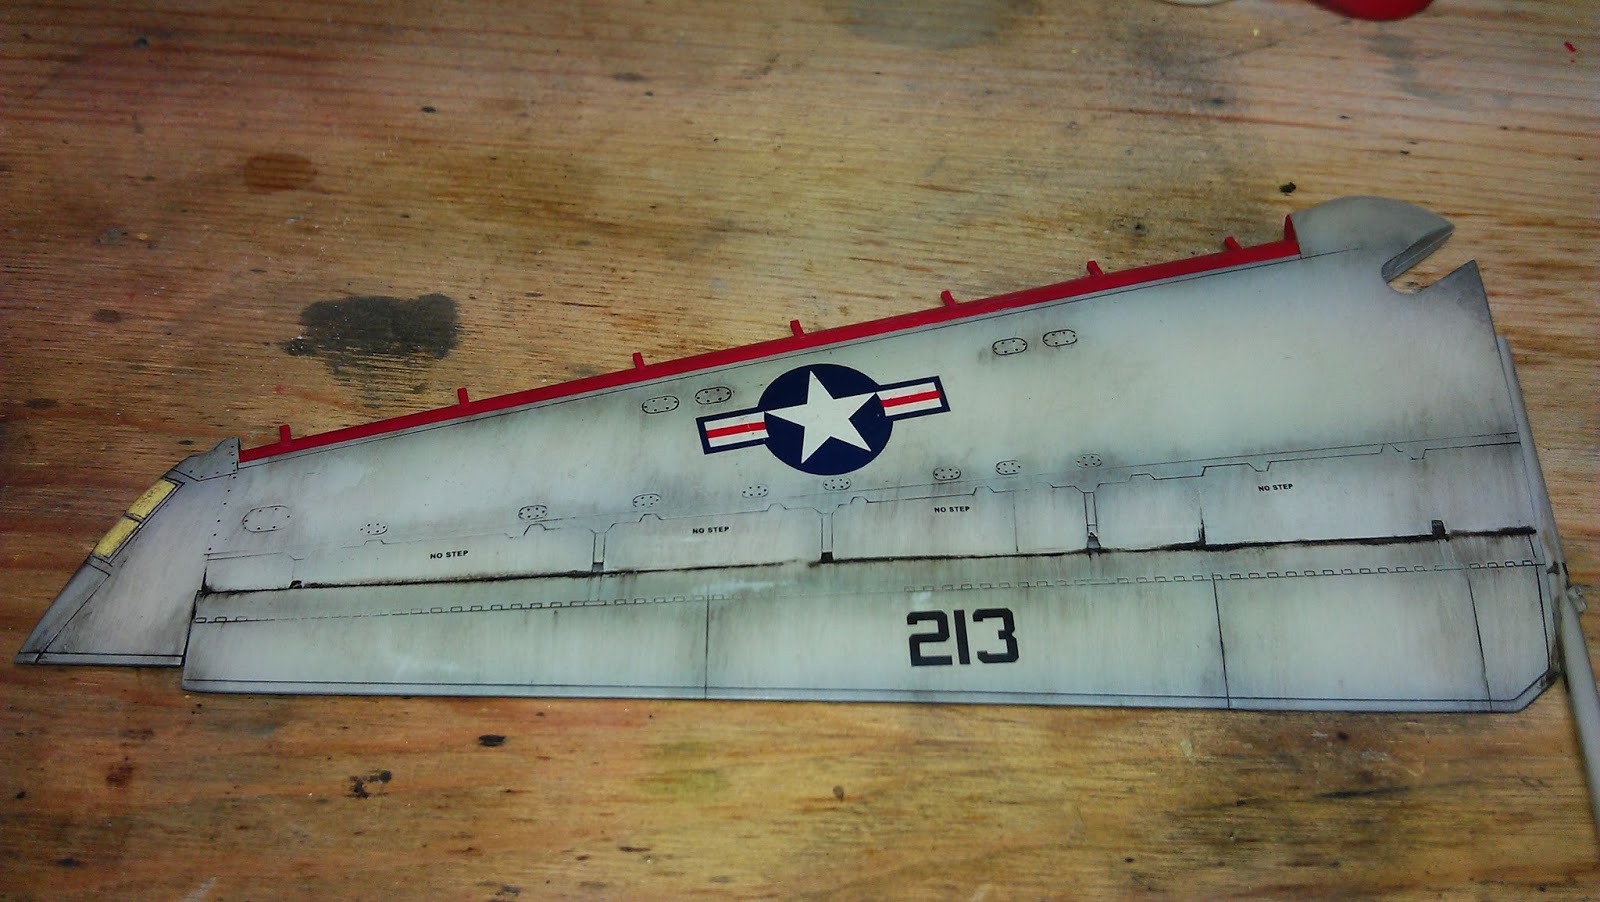
The wings are given 3 coats of Klear and then decals are added. Problem I have is the decals are too thin and disintegrated upon removal from paper. Alot of it were jig saw puzzles. So, I ended up hand painting the flight formation lights and large patches. I also used Vallejo paints to do the leading edges. I looked for Fightertown and other Aeromasters decals and ordered something like $100 of decals so that I can be sure it will work. I also added Tamiya brown wash and AK Track wash and set aside to dry for a day and then buff it up with moistened cotton cloth with Tamiya enamel thinners.

After the streaking, I oversprayed the area randomly with lightened gull grey self mixed, to tone down the contrasts and added more weathering being the moving surfaces to simulate dusts and hydraulic staining.


I added the patches of lightened gull grey to simulate the patches of new paints oversprayed on board to protect scratched or exposed metal from corrosion in the sea environment.

See the truth being told, See the amount of paint patches on this guy? I am doing like 5% of this because I know that people are not ready to accept this as a good model, they will say I sort of screwed it up. People have a lot alot to say now a days, but no models to prove that they can do it better. I also made a purposeful cut of the area of the walkway and lets see what other critics out there can say.

Doing up the 2nd wing to balance the tones of the the weathering.

Wings experiments done, now back to solve the cockpit area. This is what is left after a week of frustrations at 1 to 4 hours per night!


After doing the spray painting and toning and 4 washes, I sponged chipped the rubber walkway area like you will see on the real aircraft and chipped the port side to give it a non aligned look. The decaling prior to this is most frustrating as almost every major piece needed Vallejo painting and Tamiya diluted yellow patches to "heal" broken parts.


The wings are positioned to check for tonal uniformity, looks like more is needed for the body work to match, I also used McDonalds Ketchup disks as masks to make the oil streaks on the pivot areas of the wings and dry brushed the inflatable bladders taking care to retain the contrasts to keep the 3D effect.

The fuselage is now coated with 3 layers of Klear to get it ready for stencils. I did not like the smashed up decals, so, I masked the blast area warning lines and painted them in Vallejo through low pressures.


Almost can jalan liao. Colour matching almost there. Now back to the cockpit headaches. I noticed that Hasegawa made this model without both HUDs! OMG! After all this work, there is not a photo etch part in the Eduard set to solve this! Leave it alone before I lose my sleep, I am heading out to Australia for work and then I will endure it further, after all, you are looking at 6 months worth of enduring already! Till next time, endure!

Wednesday, January 2, 2013

Merkava III Part 3

The wheels are taken out and given a black wash followed by having the red oil nipples painted. Same goes to all the handles and the tow cable anchors.

All handles painted and ready for sand washing.

Sand and some black washing with chips and scratches added in.

Sand and brown washing on the top, the colours are also dotted with black to give it some variations and tones. But imagination and understanding on how acrylic interacts with pastels pigments are useful in this kind of exercise.

The pastel pigments when dry modulated with brown and black looks deeper than the usual flat buff colour one would expect from sand coloured chalk pigments.

The tow cables leads are painted black from reference photos, the cable is painted grey and black washed with dabs of golden brown to simulate early rusting. Colour streaks are done at the side of the turrets and more oil and grime washing was done with streaking in the exhaust area. The tract recieved their Sand washs. The canisters and fire extinguishers are now painted,


Monday, December 31, 2012

Merkava III Part 2

Taking a break from the Korean War USMC Chosin Reservoir, turning my attention back to Merkava III and IIID project.

The biggest challenge about Merkavas are the anti slip type of material. I found it very effective to hand paint the new diorama pastes from Vallejo.


The errors can be washed and corrected and the material is quite easy to control. Just take a little with the tip of the brush, and dab on gently.

The rear basket is covered with Epoxy Putty, so are the rear and side signal flags. Manlet cover is a little gappy, so, liquid cement and Tamiya Putty mix is used and melted with blending strokes and massaged into the gaps.

Once the primer has set, The model has its lines preshaded with Vallejo Black with Matt Varnish added with Dilutant. Then the whole mode is over sprayed with Panzer Dark Mud to give it the greenish Khaki Colour. The upper surfaces are shaded with a highlight with Iraqi Sand added into the Dark Mud to get the light tones. this is dusted over small areas over the top and near top surfaces to modulate the tones of exposure to light.

Another view of the whole tank that has the final highlight dusted in broader areas. There are quite a few damaged parts due to melting in my Academy kit, so, I had to kit bash 2 sets to get this one model going. However, the wheel trailing arms of both sides of the tank are different. Once set is clearly molded without the slot link between the spring and the cantilever.

Cantilvers with slots.

Cantilevers with missing slots on the whole of the other side of the tank.

But since its will not be obvious after the side skirts are added, I let the sleeping dogs lie low for now. But I do have an issue with melted parts on several trees. Its like a disgruntled worker sabotaging trees with a hot soldering iron.

The whole tank is glazed over with Panzer Grey to unify the harsh contrast. Unlike the usual enamel based variety, I want this model to be all based on Vallejo Acrylics. So, we have 20% Panzer Grey, 20% Acrylic resin, 60% water with a drop of Matt Medium. This is dotted onto the surface and then glazed over with a No 4 Brush wet with distilled water. Then I just watch the colour spread all over the pace and collecting on the recesses. Care is taken not to force ventilate the model. Allowing the pigments to settle down and dry slowly over 2 hours. Making sure the wet surface is always on the horizontal position.

Teh whole tank then recieved a Burnt Umber and Black wash to accentuate the details on the complex surface designs as well as the anti slip material that we painted on earlier.


The surface is then highlighted with Buff on the pins and points with a zero brush. The anti slip is dry brushed with a mix of Panzer Dark Mud added with Iraqi Sand, leaving the most highlighted ones being the reverts and pins. The Canvas cover is also painted and darkened with shadows on the folds.


The handles are all painted red in colour and the VHF Whip plus the UHF antennae are all painted white. The Mantlet area recieved its shadows and highlights.

Break for now. Chow. New Year counting down soon!


Sunday, December 16, 2012

USMC Korean War 1950 part III

Altered the right cheek to balance with the left. Only little bit of Burnt Cadmium Red to increase the contrast in the forward area would suffice for the completion of the face.

The right cheek corrected with some Burnt Cadmium and Salmon Rose so that the tones are gradualised. Happy with that, and attached the hood and helmet assembly. The fit is a little tight and tricky, some of the internal hood areas were damaged and needed to be repainted.

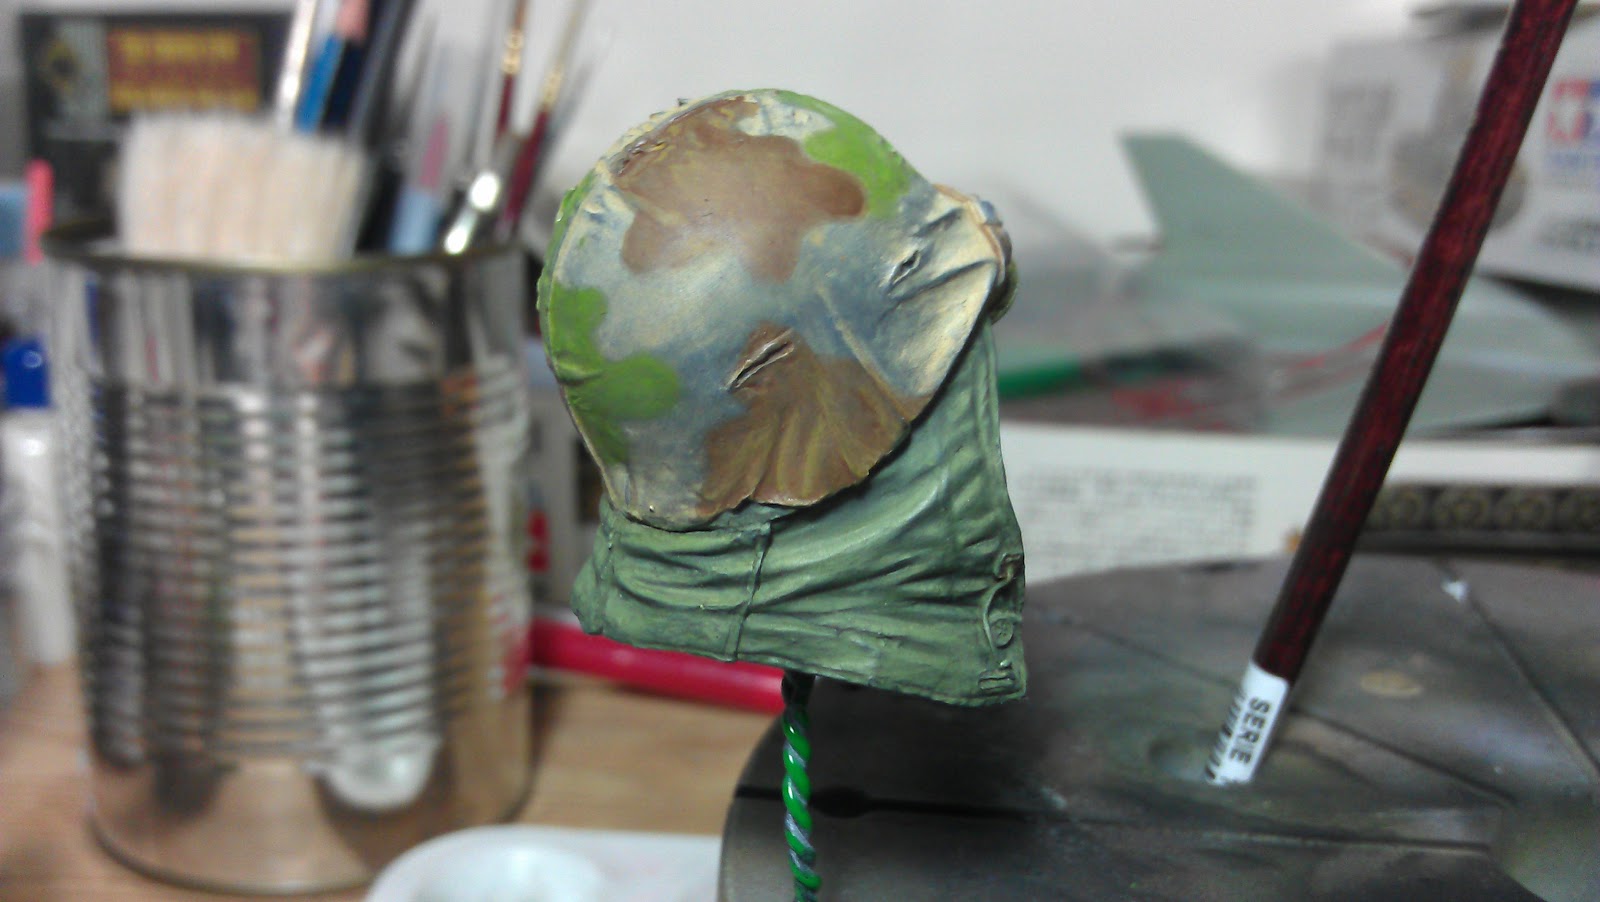
The hood repaired and needed the black lines to be lined in. The helmet has its camouflage patterns are now blocked in. The sand needed to be coated another 3 to four times before toning of shadows are set into place. The colours are little glossy at the moment, nothing that cannot be solved with dilute Matt Varnish.

The brown portions are started to be highlighted. Once this is done, shadows will be added and then same goes to the green, followed by coating the remaining areas with sand and shadows to complete the helmet. Thereafter, we can start work on detailing the holes and straps, buckles, eyelets and laces.


Friday, December 14, 2012

USMC Korean War 1950 Part 2

Took a week off to do work so that we can finish all the projects and hand them over by Christmas Eve.

The eyes are blocked in and top lash is painted and outlined with black. Beard is blocked in with pure black with some Matt Varnish added into, as well as the eyebrows.

The beard and eyebrows are stroked with dark grey and then off white to give the mane some body look.


The bottom eyeball areas are lined with Vermillion. Pupils have the blue highlighted and the iris are scaled down to portray high light conditions as sunlight reflecting from snow capped landscape during that year. Lips are painted violet red and highlighted on the lower lip edges with Sunny Skintone mixed with Basic Skintone. The helmet is sand coloured toned with highlights. The uniform is shaded with shadows of 10% black.

The hood on the helmet is shadowed with black green to get it ready for highlighting with Yellow Ocher mixed into German Luftwaffe Camouflage Green. The sand on the helmet has the shadows added with 10% black glazes. The right side of the face is reshaded with Black Brown and Burnt Cadmium as well as Basic Skintone as well as in between blend of the two colours. This is to remove the long line edged into the original resin to make the both sides of the face balanced in tonal and weight-age balance. The lower cheeks are highlighted with Basic Skintone to give it a 3D effect. The side edges of the cap extensions that doubles as ear mufflers are edged with black and Black Green. The adjacent areas of the side cheeks are toned with Flat Brown and Burnt Cadmium.