Wednesday, October 15, 2014

Tamiya 1/32 F4U Corsair Birdcage part 7

The bodywork upper surfaces were post shaded with a layer of Tamiya diluted paint mix now with 1 part XF18 with 7 parts of white t highlight the upper surfaces to further accentuate the fading process.

The sides of the fuselage has the upper surfaces highlighted 30% more than the sides.

Instead of using the decal with the film showing in a few months time, the panel walkway "No Step" zone markers were masked and sprayed on.

The walkway was highlighted with dark grey before the masking is removed.
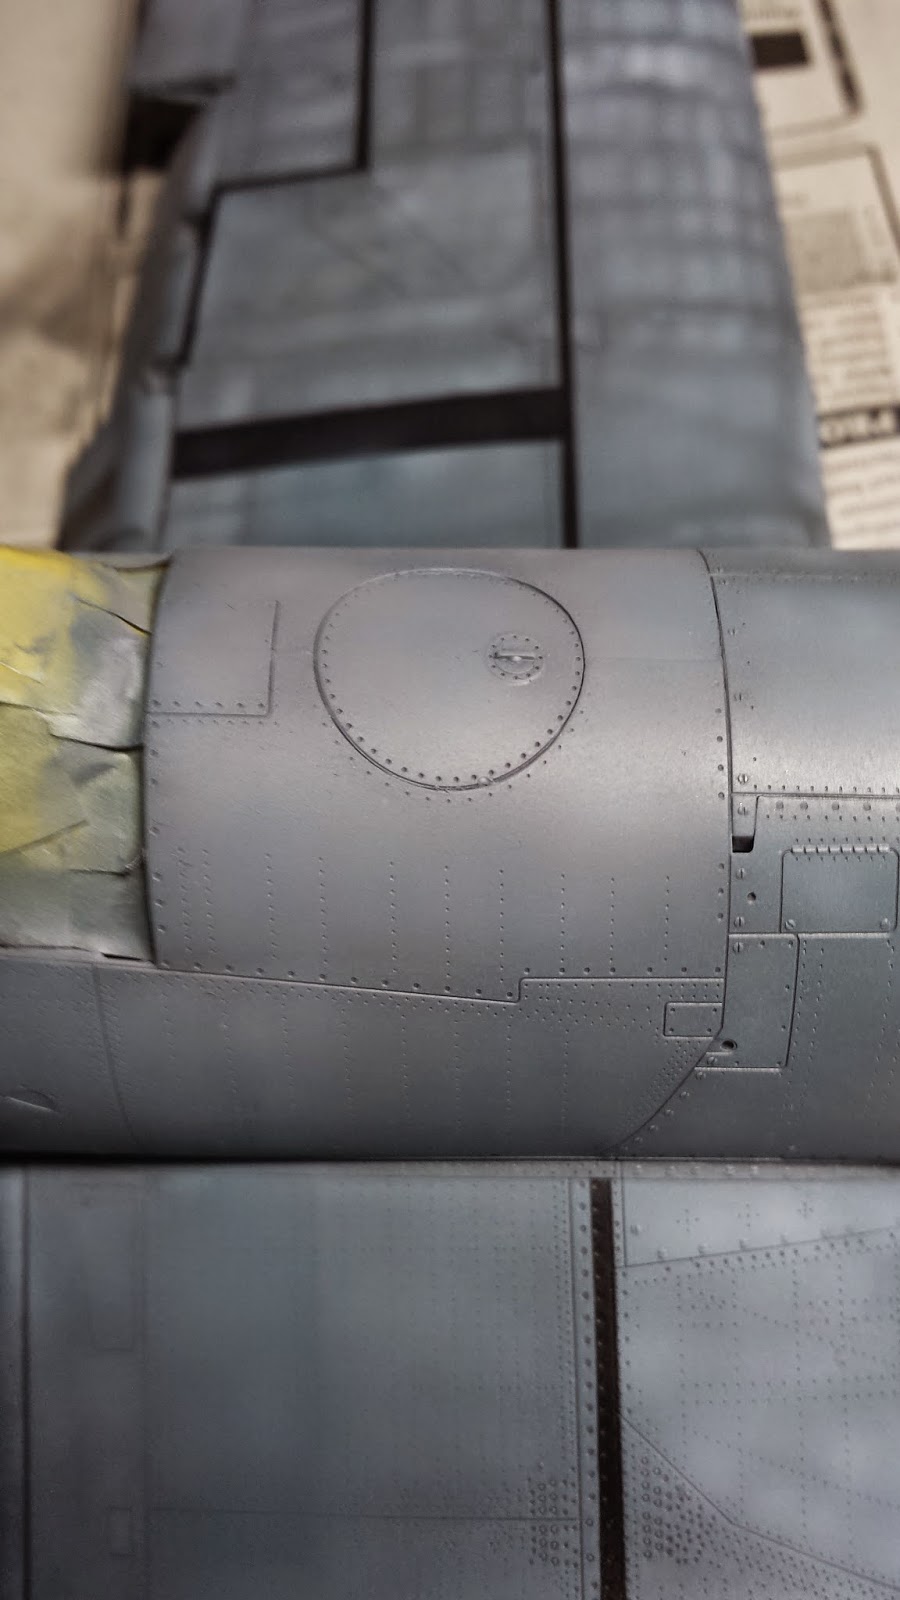
The decolouration of the fuel cell area due to spillage and evaporation of fuel.To simulate this, I use a very thin water based pinkish grey to glaze over it. 1 part paint to 20 parts water. After 2 coats, the model is ready to have its future sealed!

Now the model is ready to have the masking removed and the edges polished with a cotton tee shirt to rid it of extra blue tack and thin paint that is smudged.


The decals are added, softened with Mr. Colour Decal Softener. Once dried, the whole model is give a layer of Tamiya black wash.


The wash showing up with small patches of multiple coloured oil paints and streaked downwards to simulate the oil spillage and drying while stationary. Not the fuel cell being a different tone of grey from the rest of the aircraft and in the background, you can see the upper surfaces being brighter than the sides. Colour modulated.

The wheel wells being washed. Then they were cleaned up with white spirit to show detail accentuations. The whole under surface is toned and then washed and brushed out to clean it up.

The undersides at the tail section being washed.
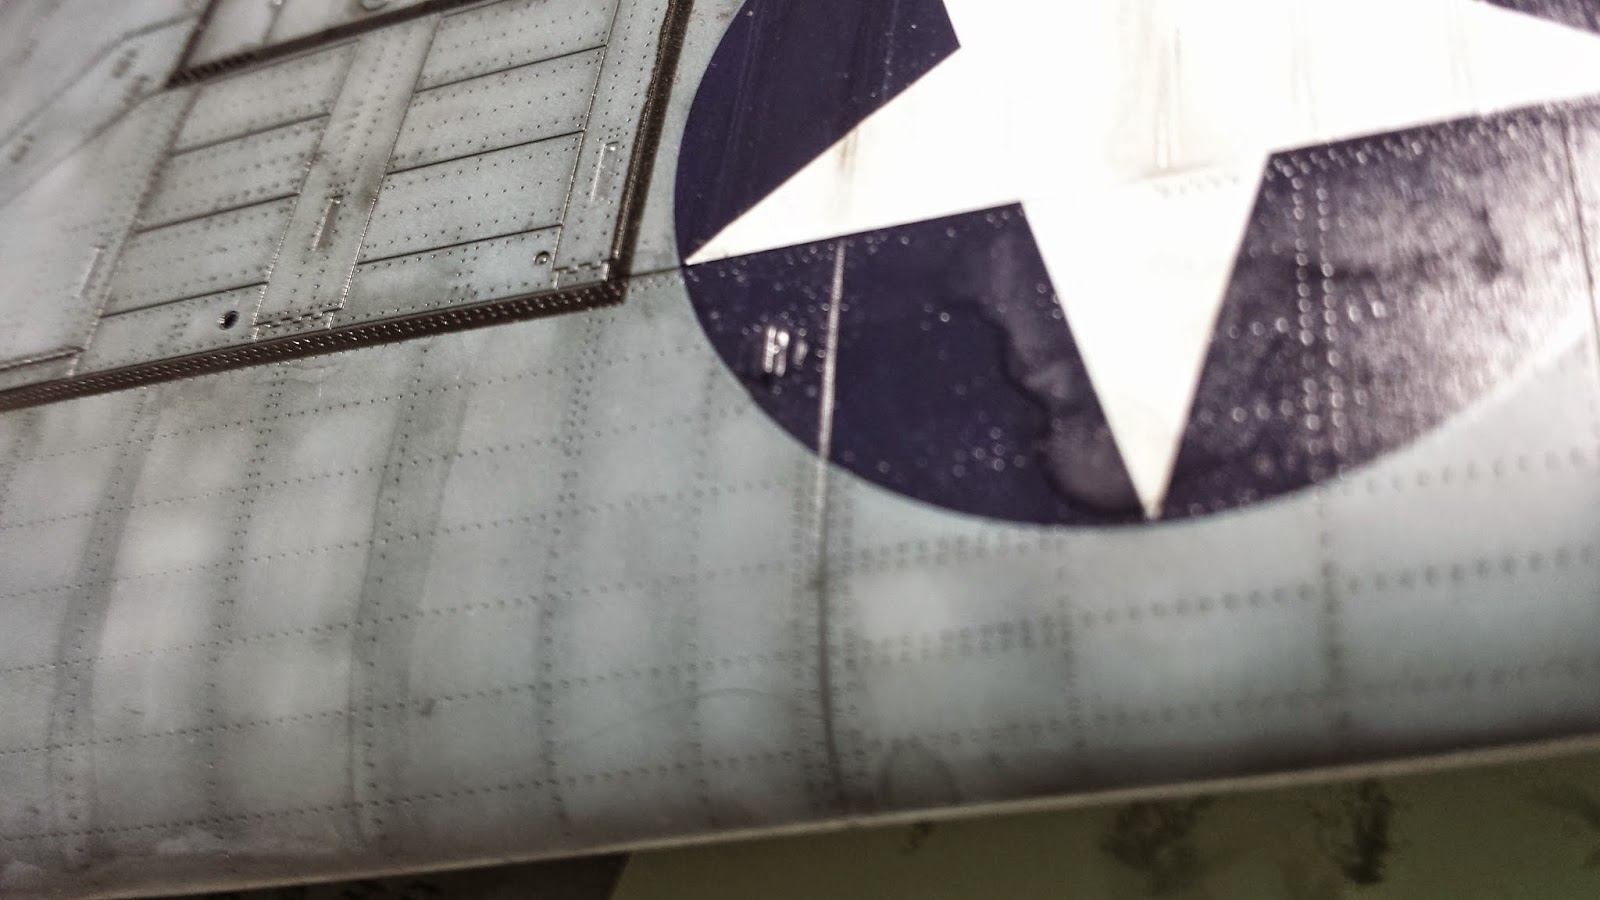

Now the decals are to be protected with Vallejo matte varnish and the wash is done over it after setting it aside for 2 days. Small amounts of lighter version of Navy Blue is used to glaze in the variation in tones for the decal on the upper surfaces.

The decals after washing and glazing. Thereafter, white spirit is used to brush the wash backwards and towards the rivet lines to exaggerate the tonal differences from the rest of the top surface, a new form of post shading experiment chanced upon for the first time by me using a number 3 soft Ashley brush.
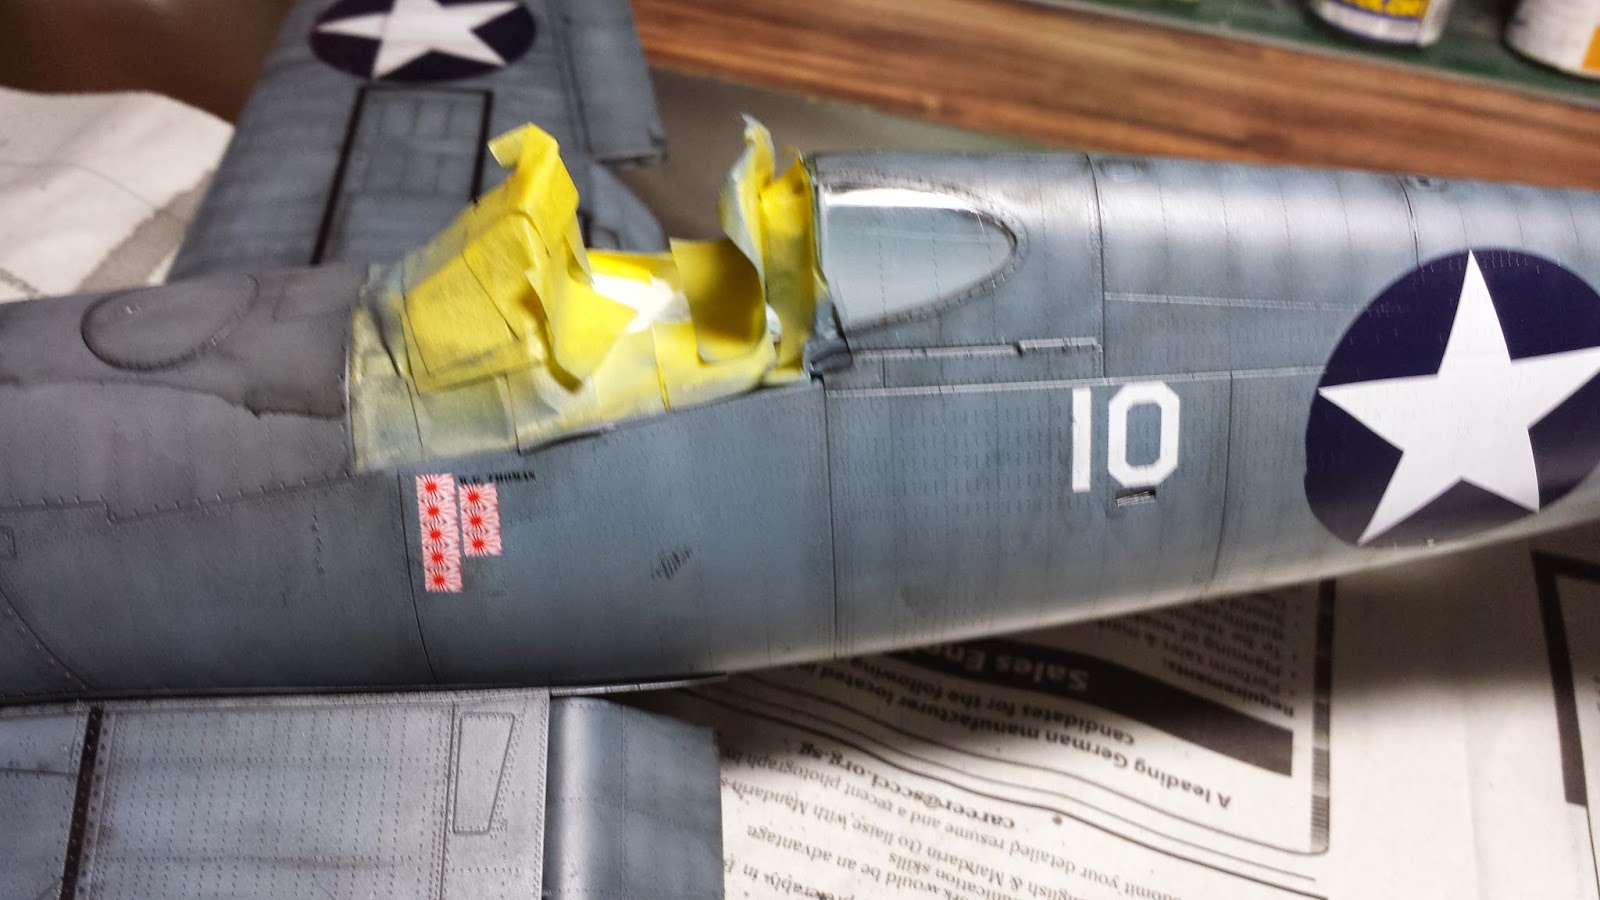
The rest of the decals are ready to get onto the model. While the surface is still FUTURED! From this view, you can see the fuel cell in front of the cockpit being a different colour.

The fun part begins. The surfaces chipping. I brushed on soapy water and leave it to soak in for 30 minutes. 3 coats needed. After 30 minutes, I wet the surfaces that I want to work on and then using a small needle tip, I make small scratches and then using a stiff flat tipped brush, I dabble the surfaces till the desired chips are achieved. Concentrating on the whole nine yards areas. Meaning, the 50 calibre magazines. Making sure the chips are slightly bigger as I wanted to add in intermediate chips of zinc chromate green at some of the chip edges.


The zinc chromate green added. The edges of the folding wing has white glaze added to accentuate the joint.

Left side done now the right side begins.

The model is now sprayed over with Matte Varnish. The undercarriage is ready for weathering.


FINAL FINISHED PRODUCT! Very proud of it. now tis ready for the antennae. And Wallah.

Sunday, April 6, 2014

Finished Photos of Tamiya Kawanishi N1K1 Shinden

Many may have wondered where are the photos taken for the Shinden, the PURPLE ELECTRIC LIGHTNING????

Truth be told, I did not take any pictures. I put in the ladders and the gun pods sometime ago but did not have time to take pictures of it having taken the time to build the Corsair.

Well here they are...the finished model. Taken in the garden table.


The edges pf the pillow is slightly and roughly rubbed off. Sorry about that. Since not many people follow this, I just did a 10 job to clean up the sides, not professionally done.


Thursday, April 3, 2014

1/32 Tamiya Corsair Part Six

Chipping Time! AHOY!!!!!

Now time to see if it comes together.

The left wing chipped. I make small chips and then try to grow them using a wet brush.

The leading edges and the wing root being chipped. Happy with the pattern.

Right Wing Chipped. But the main thing is the shiny decal. I got fed up with it and glazed it with grey tones from Vallejo. It first highlighted the rivets but also dulled the shine a little and I was happy with it. A bit of trouble keeping the brush strokes from appearing. After 2 hours, I succeeded without putting too much water onto the decal and delaminating it.

Right Cockpit areas is a tricky section to do it not too much until overdoing.

The right wing being chipped with shallow Zinc Chromate. Because, below the Zinc Chromate comes the actual bare metal. The doors of the machine guns loading bay recieved lots of attention as its the place where the action is. Its being loaded with 9 yards of ammo per gun on each wing.


Leading edges and wing roots being chipped with Zinc Chromate green. I will move towards the folding lines soon.


Canopy areas being chipped with Zinc Chromate as well.

Monday, March 31, 2014

1/32 Tamiya Birdcage Corsair Part Five

Before I begin, lets just say hello to my dog, Doughnut, miss that chap. This is one pooch that will not listen to anyone but me and will escape from any leash system ever designed by man.....Houdini incarnated!

Sleepy in the air-conditioned office. And its about to drop! Next.
Banged it hits the sack!

Engine with the masking removed. Some of the Vallejo paint has chipped and needed to be touched up with silver, not really a catastrophic event.

The star on the decal is weathered. However, for the blue portion, I will rub some pastels on it to fade it after the whole model is done and sealed in matte varnish.

Wing after it has been swept clean with brush wet with thinners. The weathering becomes very subtle.


The panels covering the fuel has a pink hue sprayed over it and washed to subdue the hue effects. This is due to the fact that fuel, kerosene type F-Gas fades the paint and evaporates quickly compared to diesel. Since it has to be refueled stationary with engines turned off, there is no chance of it making streaks. So, I clouded the whole panel with some pink to simulate the wear like we do see on our Army Unimogs, the Olive Drab turns pink in the sun after months of refueling and spills.

Bottom wing and fuselage has been black washed as well.

So are the tail fins and rear fuselage areas. The antenna root is fragile and is reinforced with cardboard to facilitate handling during spray painting and weathering.

See you next round.

Saturday, March 29, 2014

1/32 Tamiya Corsair Part Four

In order to achieve chips proper, I have to get some silver base into the preshaded plastic. I chose to use water based Folk Art Sterling. Once dry, I can then coat this with water soluble hair spray and then chip. Trick is also to let enough time for the hairspray to dry in order to achieve a robust layering that is not easily dislodged by Enamel based Tamiya Panel Accentuators. I like to paint these on and then use the Enamel Thinners from Tamiya to streak and broom brush them to the sides towards the panel lines.

In Part 3 I forgotten to include a picture of how the engine has been masked. Basically, I cut up a tissue paper into a few parts and folded them into bolsters as discribed earlier and stuffed them and then cover the top surface with Tamiya Masking tape. This helps to prevent "ACCIDENTS", which is a disaster, after all the efforts we spent to paint and chip the engine. In this picture you can see the areas where I wanted the chips to occur painted in Sterling Silver.

Then the sides of the cockpit area, the walkways, the leading edges plus the engine cowlings are all painted to diluted AK Interactive's heavy chipping fluid. This is set aside to dry for 24 hours. Which is not enough, After weathering it later, I found the paint to be too soft and some figure prints were showing. I had to respray that section and set it aside to dry while I go get myself tortured in a 4 hours speed chase all over the island 5 am this morning! On bicycles of course. We took an extremely hilly route through Tampines Viaduct, old Lower Pierce, Mandai, Woodlands Industrial Park, to Admiralty Park, down Admiralty, through Yishun, then the windy Seletar Island next to the aerodome, all the way through Ponggol then Hougang and Old Tampines Road and then home! Very shag! Elevation gained today is about 800m in total. Nothing but cheonging with 3 other guys, 2 of which are in their twenties, half my age, and weight, it takes its toll after a while.


Once coat has dried, I tried to test the spray painting the bottom off white grey to see the effect.


Then I started to work in the colour at the bottom in glossy finish slowly. 30% paint, 70% Mr. Colour Thinner. It is sprayed with very low pressure. However, I have a faulty tigger mechanism in my Creos airbrush which is a huge frustration to use. The air trigger gets stuck downwards at very low pressures and I have to control the pull back to activate the paint on and off. Meaning, you can get overshoots easily, so, it took 3 hours to paint the bottom, which otherwise, I could have done in 1 without the problem. I had another 0.2mm Tamiya airbrush made by the same guys, however, this one, has an open top and spills easily with only 2cc content cup, can be a frustration as the paint may spill and its evaporating all the time. You cannot work on odd angles too. Unlike the Creos Mr. Colour 272. Without the trigger problem of course.

Tail fins carefully painted with the light grey. Leaving some areas showing huge shades. I wanted the strong contrast as the washes later are going to affect the contrast a lot, thereby, will blend it somewhat.


Bottom areas all clouded and happy. I read the article by Spencer Pollard some months ago on Model Aircraft International. The wheel bays, the cockpit rear window areas were painted wrongly with interior Olive Zinc Chromate. It should be bottom colours for the wheel wells, and body colours for the cockpit rear windows. In the rush to build the model, he also did not paint the interior parts of the rudder and filter areas in powdery pink, which is a mix of Rosa from Tamiya and Hull Red from Creos. I have written articles before for them, the dead lines, the need for clean background, moving my job back and forth from my table to the studio and then back, is a major headache. Also, the subject matter, to publish the newest kit before the other mags do it is also added pressure. I now prefer to let model making remain a hobby and forget the hectic scheduling of trying to write for magazines. In the end, I make better models and use this platform to share with those who love following my blog, which is almost on an "by invitation" only basis.


Part of the wing that I tested the white is masked in order to allow me to paint it in the upper colours. This is done with extreme care not to rip off paint later as parts are coated with AK Interactive Chipping Acrylic Fluids.


The dividing edge is masked with blue tag for a soft edge finish. The remaining areas covered with Tamiya Masking tape.

The top colour is applied. The shadows has greatly been subdued. This is then painted over with Tamiya Black Panel Line Accentuators. And then boom  brushed to the sides to create lines and uneven surface texturing.

The same wing after broom brushing off the washes. The rivets, the shadows and the gradual tonal differences are beginning to create an interesting pletora of hues of the same colour.

The panels are clouded over with lighter tones of the same colour giving emphasis on to top surfaces. The refueling area, I need to cloud with some pink tones later to simulate discolouration by spilled fuel on paint.

Side view of the highlights. I try to preserve the verticle rivet lines to create variations in the skin, even though some parts of this is covered with decals, I wanted to have the option to position the decals with the freedom to move it around without too much ACCIDENTS from happening!

The harsh contrast tones are then subdued with an overspray of the highlight colour with more dilution with Mr. Colour Thinners. Now, the model is read for decals and chipping later. Enough done for the week. I gotta to catch Captain America!! See you the next post.