At long last, the model was ready for marriage. VW speak for putting the bodywork and the chassis/drivetrains together. For this case, its the front fuselage with the rest, Well, it isn't made in heaven and the fit was far from good.

For the start, there seemed a problem to get the whole front to fit snugly into the fuselage. There is a gapping hole of more than 1mm that needed addressing. The shape also need to be compressed. It is solved by using 3M superglue and the accelerator to both act as an adhesive as well as a filler in parts. So I forcibly made the marriage work to bend the parts to conform to each other's contours as much as possible. There is the start of a whole plethora of fitting gaps along the sides of the cockpit walls and the intake ducts. Gaps are so huge, they needed 0.8mm plastic cards to be inserted and Tamiya Putty mixed with Tamiya Cement to fill up and melt the adjacent materials to form a permanent and solid substrate for sanding and rescribing the panel details later.

You can see that I used the plastic card on half of the joint and the other with 3M CA glue to make it a very strong bond. I needed the CA glue to hold the thing together while the plasticard and cement sets the melted adjacent materials. One cannot help but notice the puttying needed for the two halves that constituted the forward fuselage. The stepped differential between the left and the right is huge. This can be a a result of the mould material being over extended in this special edition. The wear and tear resulted in the misalignment of some of the critical areas. Flash is also present in many of the parts that are small.

I chose to make the model with the refueling probe retracted as with parked aircrafts. The model was designed to have the nose cone opened to show the radar system and the gun. However, if we gonna put up a parked vehicle system, the fit is somewhat like the models from the 70s, offerings like I said earlier, to the tune of Revell, Frog, Lindberg and Airfix. The gaps took me 2 weeks to sand and refill. The cone shape does not match the profile of the fuselage and needed to be corrected and built up with putty that required 5 rounds of filling and sanding to make up for the shrinkage. Thereafter, there is also the nightmare of rescribing the panel lines and drilling back a few hundred rivet holes!

For a kit at this price, I would not expect sink holes, but there are many. Including this warped air brake panel.The sink holes are easily filled and sanded. 2 rounds and 3 days of curing should do the job, but the fit was a monstrosity. I had to soak the part is hot water to soften it to bend it back to shape to conform to the fuselage. But the gaps needed lots of filling and rescibing. Evidently, it was designed to be opened and attention to fit was lacking in the engineering of this part of the tooling.

Look at the mess of this massive model. The CA glues, the putties, sanding blocks, sticks and papers, along with splatulas, scribers, drill, liquid putty....one heck of a chore. I have not made a more tedious model since the 80s. I was surprised that this Trumpeter new issue is so crappy in the fit and finish department! The wings are also very flimsy and the extenders for the forward edge of the wings are fragile as they aren't molded into the wings to save costs. they are small sticks that have to be each aligned and glued.

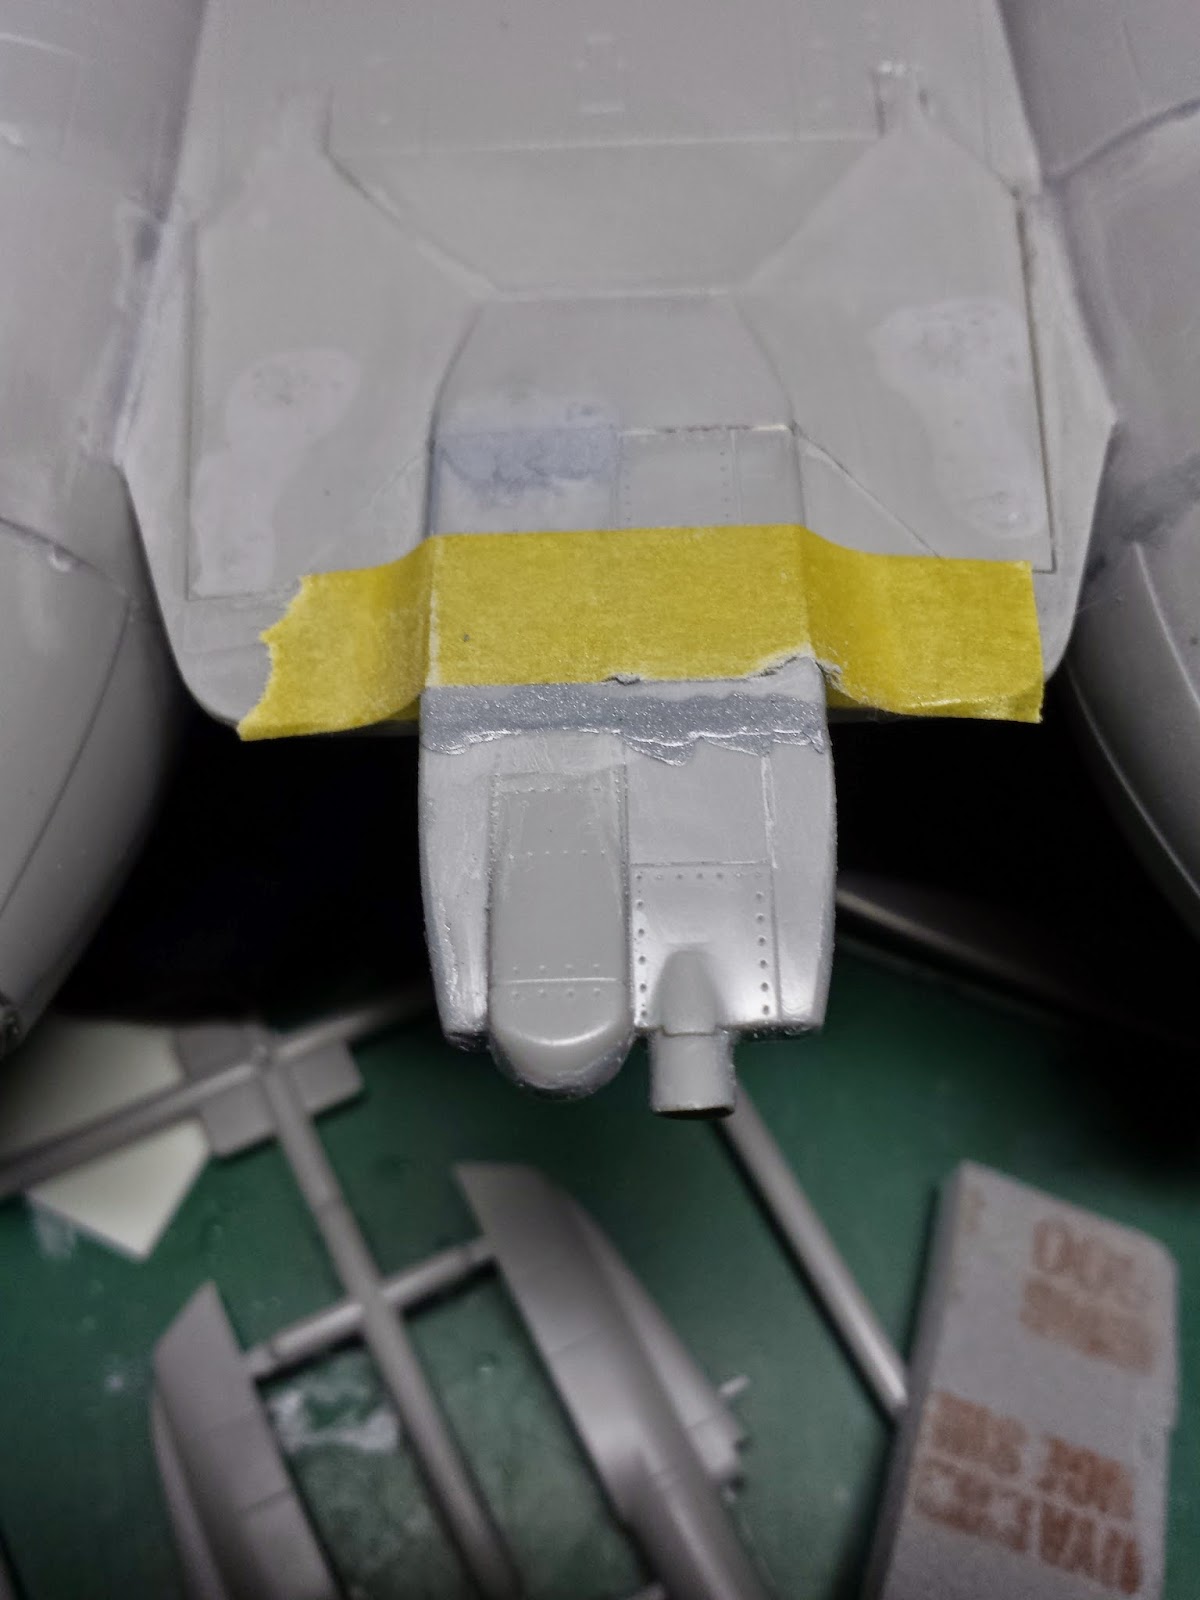
The rear radar sensors and fuel dumping valve body is attached and the fit is self explanatory from the picture above. You can also tell from the top of the picture that there is a huge sink hole that needed to be filled and sanded 3 times to achieve a smooth finish. The fit of the air brakes are bad too, from this picture, you can tell the alignment and gap problems this part has in blending to the body work.

The avionics spine needed to be filled again as well as the joint for the 5th time as a week passed and the putty shrink again. This was further repeated another 3 rounds that took out a week.

Ths air dams in the intakes does not sit flush to the front leading slats. There is a gap about 4mm and needed to be filled with plastic cards and putty. The sanding and filling took me a week, 7 rounds to get the finish that I wanted. So are the sides of the bottom part holding up the cockput. It is aligned off centre and required lots of building up and sanding smooth. Then the conformal Phoenix and Smart bomb rack is fitted. These parts are straight, but the body was not, so, it needed to be CAed, and the force bent to sit flush with the front portion and CAed. Once catalyst is applied, these are wiped down and loaded with extra thin Tamiya cement to form a permanent seam.

Setting the whole plane to cure takes up my 1.5m2 of table space! Care is exercised at all times not to break the front landing strut as it cannot be assembled post painting. Indicating that the designer of the kit is not an experience aircraft model maker that does not understand the logic of airbrushing painting procedures.

The anterior fins are molded in two parts and the fit was bad as the rear portion is too short and required to be built up with plastic card. The fins are too thick by almost 0.6mm and required sanding to sit into the slots molded into the fuselage. From this picture you can see that the fins are too thick. Care must be taken not to sand it our of shape. This would be causing a gap to form and the part to be weakened. The fins are slotted in finally to sit snug.

The front and rear mattrage part required a 0.3mm plasticard to be insert. Once cured, cut to shape with a knife and the lines filled and sanded twice to get a smooth finish.

Finally, the canopy needed to be painted inside with Tamiya clear green and leveled up with Johnson Klear. The mask is removed from the innards and the externals are masked. The gaps on the front does not match the shape of the clear part and required 2 coats of liquid putty to get in shape. This is then sanded along with the seam line on the top and bottom of this part.

The joint of the wing and fuselage part required filling and sanding. This took 3 days and the panel lines are re-scribed.

The refueling probe area being addressed again after a week of shrinkage to make sure that it will appear flushed. The nose cone area needed to be built up again for the 6th time to make sure it sits flushed. The opposite side with the gun mantlet is very daunting as it had lots of rivets that needed to be drilled with 0.2mm steel drill!

The sides of the cockpit required filling and sanding. There area bout 30 rivets that required drilling.
The radar detection module and fuel dumping valve is fitted and require building up of almost 0.5mm in thickness differntial. This is sanded with protection of the forward portion from being obliterated. This has become the frustrating standard procedure of this build.

The canopy is masked and tacked to the fuselage. The antenna is attached. But the hole is gaping and required filling.This is sanded and refilled.

The Kevlar bladder required filling as the part is not moulded straight. This is done several times to fill up in sequence to achieve a more permanent flushed surface.

There is some shrinkage on the top fuselage and it was re-puttied.

The cock put sides area almost done. It required more sanding and filling and thereafter drilling back the 30 rivet holes.

The canopy front portion was pressed and glued to fit flush on both sides. Now, the whole model is almost ready for painting. 1 week more of sanding and scribing required. This is one crap kit that left me no choice as there isn't another close to it except the 30 year old Tamiya offering that had no panel details once you sanded it all down!