Hi Guys, after a long break its time to update again. I finished the model sometime in January of this year and was greatly appreciated by the collector who commissioned it.
There were some fit problems with the canopy as the transparent part was a lot bigger than the frame that carries it and had to be filled and held in place till the epoxy resin sets, some 24 hours later.


The part where the rear vertical stabilizer and horizontal tail flaps were not made properly as the bottom half of the body is about 3mm narrower than the top and had to be built up, sanded down 1.5mm each side and then details scribed over using riveting tools and scribers. After the thing is done, it looks pretty good.

The intake area were warped and needed to be forced into place and CA glued and sanded several times to get it to flush. Its said that I deleted the stuff by mistake.


There were problems with the radome that was not the same profiled shape as the bodywork, That needed a lot of puttying and sanding and then re-scribing the lines and re-drilling about 100 rivets back in place to rectify it. The gun area also were recessed and required propping up with 0.5mm plastic card and some liquid putty which I mixed up with Vallejo putty and rubbed down with ethanol after it cured. This was repeated 2 more times to get it to flush. The area is metal finished so it required polishing with cotton rags before I painted it.

The fuselage had nasty long molding line that needed careful sanding, followed by 3 rounds of liquid putty that I created with Vallejo putty and polishing with cotton cloth and ethanol.

It may look alright now, but the wing roots were a pain in the arse. The body is 1mm thicker than the wings at the wing roots where they joined. This took me a long time, I used a triple stacked 0.3mm Tamiya card to make up the steps that is very gradual. Making a 12mm width bottom strip, then a 7mm middle strip and then a 4mm top strip. This is glued flush one side and flushed to the fuselage body and then filled with lots of Nitrocellulose putty, This is then sanded down. Then putty goes on again, sanded down, then repeat 6 rounds. Took me 2 months to rectify this as its the most prominent place. After that came the painstaking task of returning the details on the wings that were either sanded down or covered. This is why I did one side of the wing, and after I am happy with the result, I used the other untouched side as a reference to return the details, Then I repeated with whole process again on the other side!!!!!! Madness.


Once the paint goes on, it made justice to the work done to restore everything to my liking. I am happy that it worked.


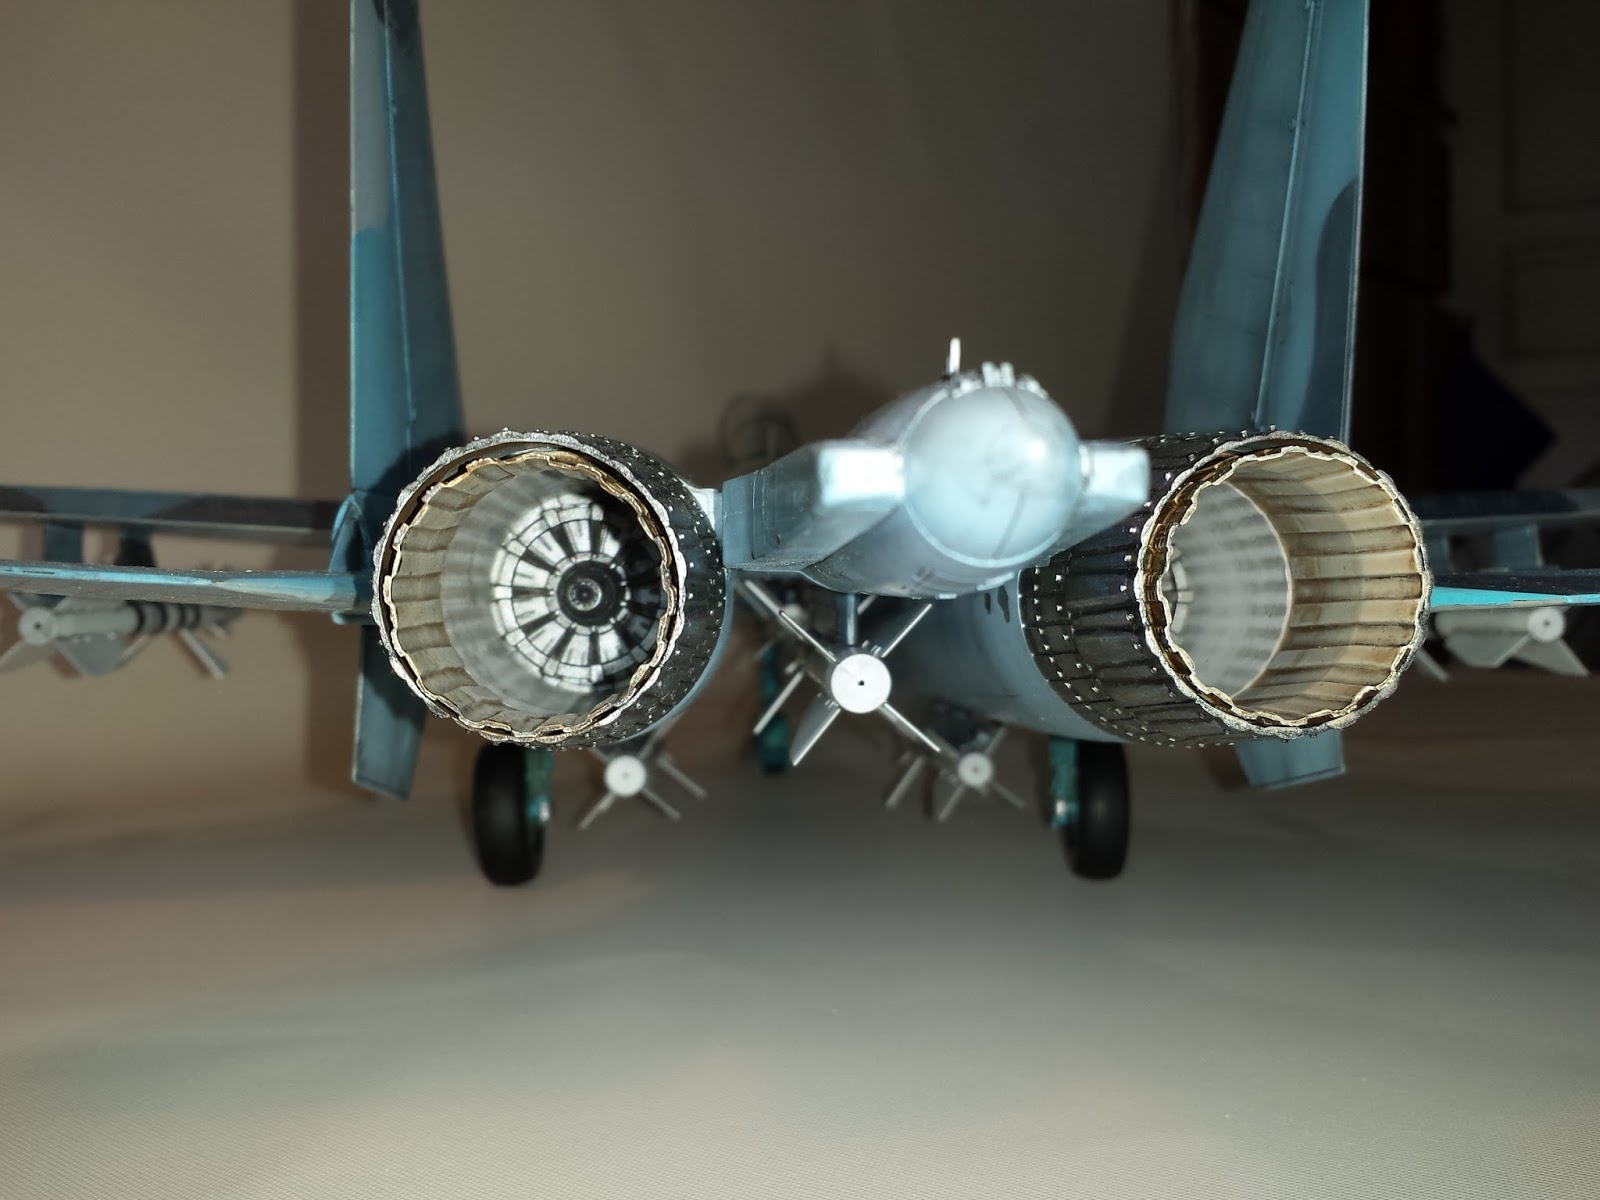
I made sure I painted the nozzles in the various sections and weathered them before I glued on to the body works. I also tested the Real Metal cream from AK for the first time. Quite happy that it turned up okay.


Happy that it turned out ok. Photos are taken with my mobile phone.Sorry for the lack of resolution. But do enjoy anyway.