Monday, June 6, 2016

Hi Guys, after a long break its time to update again. I finished the model sometime in January of this year and was greatly appreciated by the collector who commissioned it.

There were some fit problems with the canopy as the transparent part was a lot bigger than the frame that carries it and had to be filled and held in place till the epoxy resin sets, some 24 hours later.


The part where the rear vertical stabilizer and horizontal tail flaps were not made properly as the bottom half of the body is about 3mm narrower than the top and had to be built up, sanded down 1.5mm each side and then details scribed over using riveting tools and scribers. After the thing is done, it looks pretty good.
The intake area were warped and needed to be forced into place and CA glued and sanded several times to get it to flush. Its said that I deleted the stuff by mistake.


There were problems with the radome that was not the same profiled shape as the bodywork, That needed a lot of puttying and sanding and then re-scribing the lines and re-drilling about 100 rivets back in place to rectify it. The gun area also were recessed and required propping up with 0.5mm plastic card and some liquid putty which I mixed up with Vallejo putty and rubbed down with ethanol after it cured. This was repeated 2 more times to get it to flush. The area is metal finished so it required polishing with cotton rags before I painted it.

The fuselage had nasty long molding line that needed careful sanding, followed by 3 rounds of liquid putty that I created with Vallejo putty and polishing with cotton cloth and ethanol.


It may look alright now, but the wing roots were a pain in the arse. The body is 1mm thicker than the wings at the wing roots where they joined. This took me a long time, I used a triple stacked 0.3mm Tamiya card to make up the steps that is very gradual. Making a 12mm width bottom strip, then a 7mm middle strip and then a 4mm top strip. This is glued flush one side and flushed to the fuselage body and then filled with lots of Nitrocellulose putty, This is then sanded down. Then putty goes on again, sanded down, then repeat 6 rounds. Took me 2 months to rectify this as its the most prominent place. After that came the painstaking task of returning the details on the wings that were either sanded down or covered. This is why I did one side of the wing, and after I am happy with the result, I used the other untouched side as a reference to return the details, Then I repeated with whole process again on the other side!!!!!! Madness.


Once the paint goes on, it made justice to the work done to restore everything to my liking. I am happy that it worked.


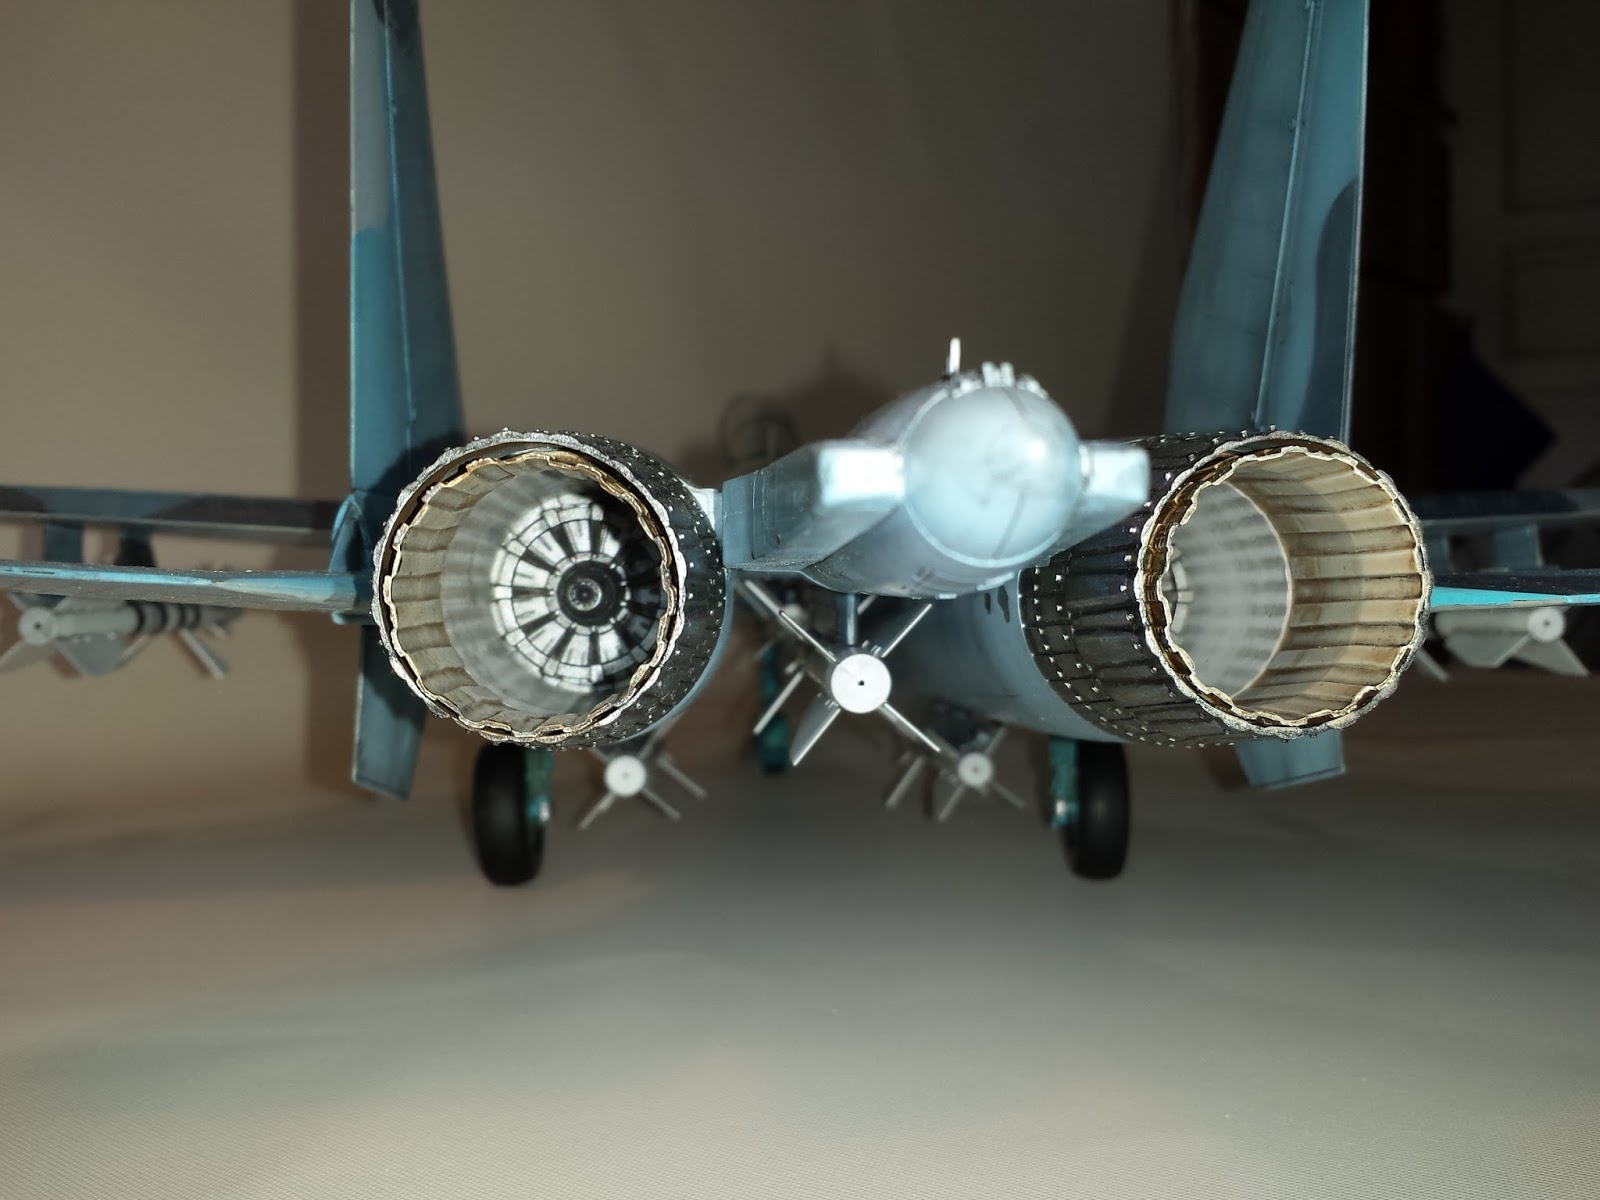
I made sure I painted the nozzles in the various sections and weathered them before I glued on to the body works. I also tested the Real Metal cream from AK for the first time. Quite happy that it turned up okay.


Happy that it turned out ok. Photos are taken with my mobile phone.Sorry for the lack of resolution. But do enjoy anyway.

Trumpeter 1/32 Sukhoi SU 27 Flanker B

This would have been the toughest build in 32nd scale in my life and it took well over 9 months to complete the project. Its quite a crap kit and very distressing to build which ended up with me being given the nickname on saturday gatherings as the "SANDCRAWLER"

The fit on the wings were particularly bad as the thickness of the wing and the wing root has a step of more than 1mm. This has to be built up instead of sanding down as sanding option would have weakened the wings substantially. This was done with 2 layers of 0.3mm and 1 layer of 0.5mm Tamiya and Evergreen polystyrene sheets of variable width. The area was then puttied and sanded down, The process was repeated 6 times in order to get a smooth fit. This was then re-scribed to get back the numerous wing top details. The rivets were drilled back into place using 0.2mm drill bits. I broke 3 pcs in the process as they tend to roll off the work table and hit the ground.
The intake area need really some serious work. This was done using plastic cards and some Vallejo putty painted over and cured and painted over again 4 times. This took place over a period of 2 days. The area was rubbed with ethanol and painted over twice again with the putty and subsequently rubbed down and polished with Ethanol and Tamiya 1500 grit sanding foam. Care is also taken to do the same for the externals of the intake areas to preserve as much details as possible.

The tail section needed very careful planning. The joint is so bad that the step was 1.2mm on one side and about 0.7mm on the other side. The plastic was badly warped and needed to be forced in place with CA glue and accelerators. To sand own the top plastic is the short cut, but then the vertical stabilizers are protruding over the sides which is not what is on the real plane. The area has to be smooth. So, what I did for the wing is repeated here unfortunately, putty and sand and putty and sand and putty and sand and putty and sand and putty and finally sand and polish and scribed back the details. It took me 3 weeks of 2 hours a day on this part alone.
We can see from this photo on how flushed the area is.
The nose cone is mismatched in shape and needed the sand build up and sanding and scribing. Took another 1 week on this one.
There were quite a few sink holes that needed attention on the top surfaces. The wheel well areas as well.
More sink holes. Some serious ones I use putty, The shallow ones, I used Tamiya Cement reinforced putty.


The area where the wheel wells joins the bodywork has serious alignment errors and had to be stuffed with melted plastic card and then re-inforced and finished with putty.


Thursday, August 27, 2015

Mustang III Tribute in Airfix Aeronautical Competition

Two days before the competition at the studios of ITE Cental

Me and Sim brought the models over to ITE Central as Sim was travelling and could not be on time. I was on my way to Beijing too and Grand Master Ee Keok Lye helped us to submit the models to the show two days later.

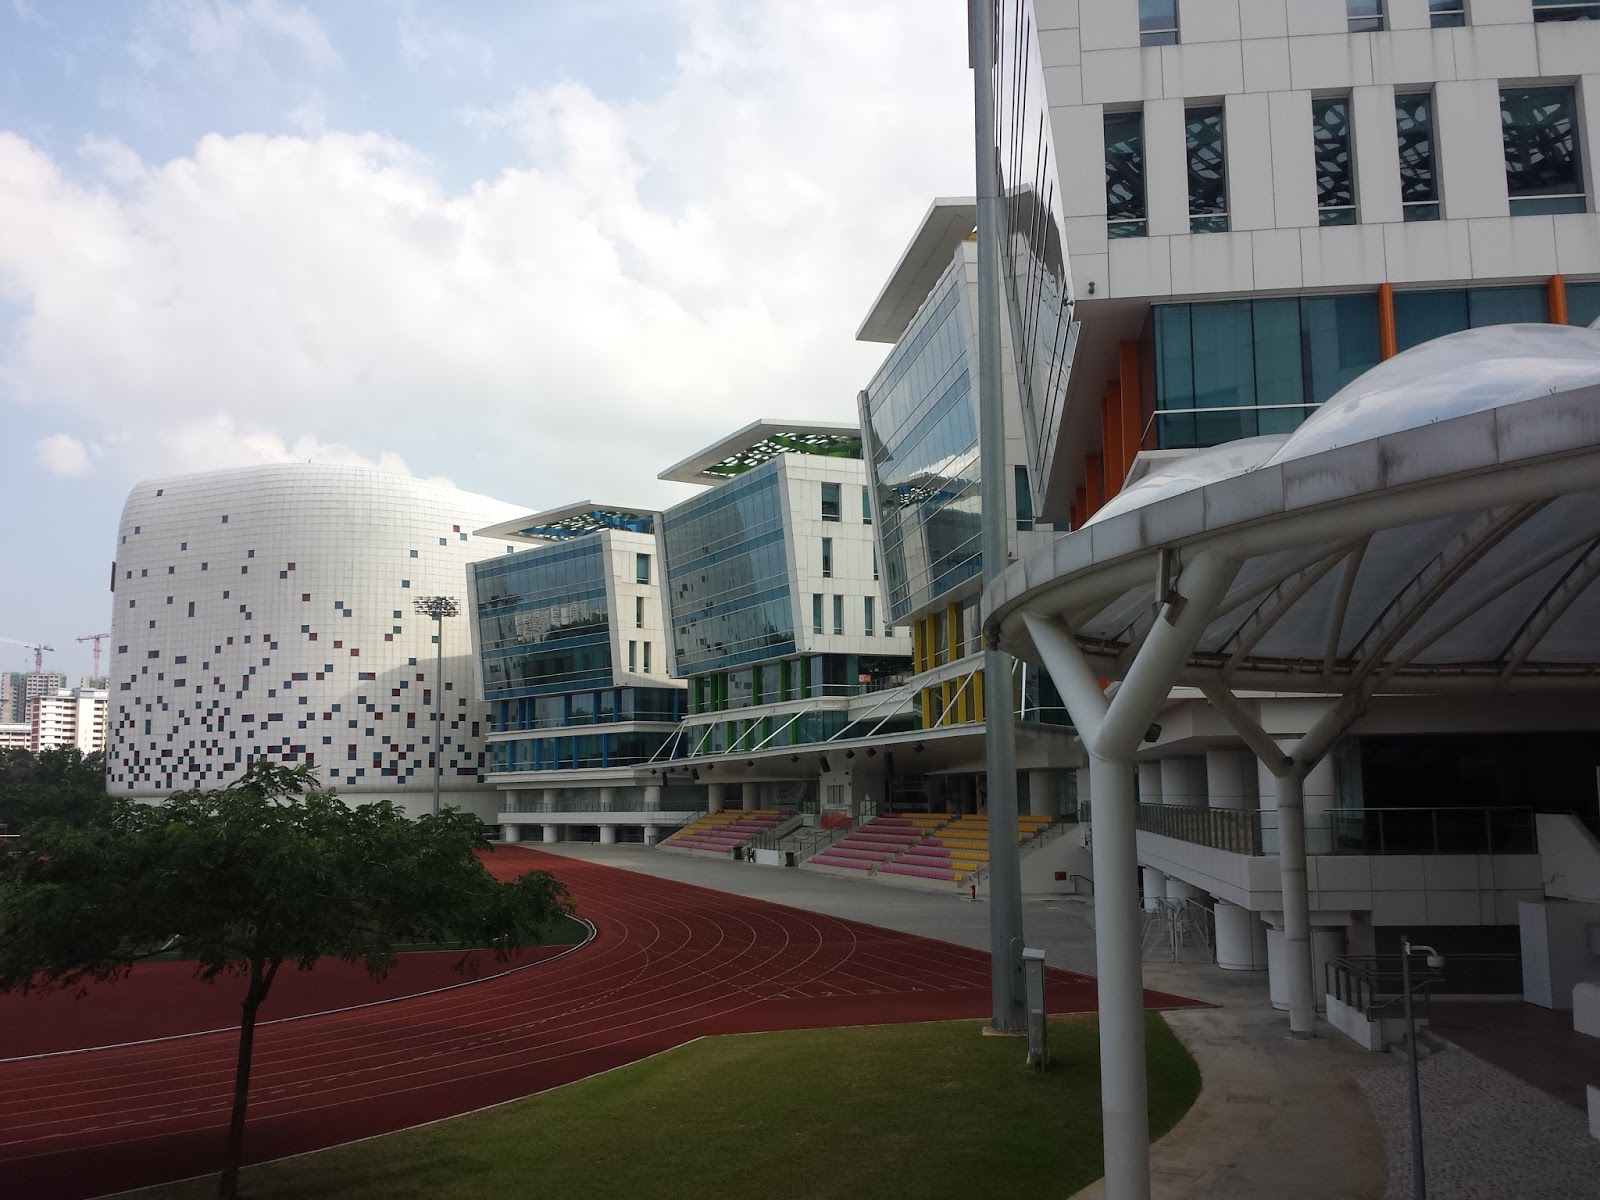
This is the new beautiful campus built in the Prime Minister's ward Ang Mo Kio complete with NTUC Supermarket and restaurants with free parking to serve the community. Along with full Olympic pools and running tracks which the residents can use for exercising in the evenings after school hours. Amphitheaters and aerospace display areas are hot areas too for students to gather and chit chat. I was told that there are 3 canteens, and I went to the basement one with air-conditioning. Its better built that NUS I must say.


There were plenty of Singapore 1965 Tengah Air Base themed Javelins. This one is by Ee Keok Lye's close buddy.

This is Ee Keok Lye's Grand Master Champion entry with two "bikini" boys in boots.

This Helix by Ee also took home a commendation medal. It was summarily sold too.

This sundowner F4B from Ee also took home the commendation medal.

There were some creative entries like this torpedo hitting the waters being released from the Fairley Swordfish is one example. There was also a Space Shuttle with LED lights in the plumes which was awarded the Best Creative Award.

Beautiful F5E aggressor from Sim, an SIA Aerospace tech for 20 years. The rendering of the paintwork is superb, however, one of the judges, Mr. Leslie was not impressed and penalised him. He believed that aircraft should be like those in the RSAF, clean as a whistle. Problem is, RSAF trained for show, others trained for war. We used the F5 twice as long as the Americans. Sigh....its harder to paint a weathered look and prizes went to the amateurs instead of the more proficient ones. If this is the trend then modelling standards in Singapore will fall behind the world scene due to competition judging bias. Modelling is an art form, it should pay dividends to those who developed better techniques and paint them well instead of just gluing the parts together. I hope we have a change in judges soon to match up with the global standards and trends in artistic interpretation of modelling, otherwise, the hobby is dead.


Other views of the F5E with superbly detailed AIM9 Sidewinders. Kudos to the efforts. Unfortunately, he won nothing.


This Kamov is my favourite entry in the competition as it was well rendered and the details of assembly is very crisp. Paint rendering rivals those in Spain, Italy and Scandinavians. Super steady hands in the panelling and light weathering. Unfortunately, its also penalised and won nothing by the infamous Leslie whose models are 20 years behind time. If Leslie were to bring his best and put it next to this in Euromilitaire or IPMS, this chopper would have chopped him to bits. This is worthy of a gold medal in Europe, and Leslie can keep is not mentioned category. I have made this clear to Hobby Bounties after the meet. If we are not aligned to the world standards, then, there is no improvements over the Lindberg and Frog model days where they were packed in a plastic bag. It becomes boring and no efforts are made to make the models stand out and differentiate from each other. If there are 20 Javelins, all painted with one grey and one green, then the whole show is crap.

Captain SK did this F5E aggressor. SK have a superb neat work and the camo looks like a pain to do. Light touch of weathering makes this a very neat model. Won the commendation medal. Congrats brother.


The one that got away. Sim's F16D in USA. I have told him earlier that he can tone up and bring the shades up a notch to make it lighter as the weathering normally brings the whole thing a few notches darker. Unfortunately, its too late, he already had the decals on and cannot paint it further. Otherwise, it would have won something. This case, I would have agreed with Peter, the organiser and judge that its a little too worn out. Had it been in Hellenic Air Force colours, it would have been a better representation. Sigh, lesson learnt.

48th Academy F4C from Viet Name. Quite a nicely done entry. Like the light touch of weathering.

Chop shop diorama of a nice Corsair. work was done also with resin parts to depict the chopped areas. Interesting twist of view. Liked the grass backgrounds.

Swordfish sorry for the bad picture taken with my mobile phone.

Mr. Sprucutters with a nice commendation Model and a good Lancaster kit.

Wide smiles for almost everyone due to Peter Chiang's great generosity.

Sim won two commendation medals. Including a 24th scale Harrier Jump Jet.

A happy SK with his favourite subject, a Focke Wulf 190 or a ME109, which ever, he is a happy lad. 

The prizes by Peter is really generous and it makes it worth the effort to do a good job every middle of the year, now being the 9th time its been held. Well done Peter and we thank you for supporting the hobby. I hope the tweaks on the judges will be better off to improve the look and feel of the show. I hope that next year, there will be more dioramas on show to make it more interesting. Being an aeronautical competition, dioramas will increase the overall spread of skill sets in modelling, including figures, land vehicles and buildings. This will make the show a lot more interesting.

My haul of the day, including buying Ee Keok Lyes 24th scale new Airfix Hawker Typhoon for S$150. The 72nd Mirage is a superb kit complete with resin cockpit and landing wells. I was so happy with the haul I have forgotten to take a picture of my entry! Crap!

For a better and more comprehensive coverage, Spruecutters did a better job in his spread of photos. By the way, he got home a commendation medal as well.